cardano up is a command line utility for managing Cardano services. cardano-up allows you to use a command line utility to install Cardano service by using docker images.
Let’s walk through how to open cardano-up and see how we can use it to install Cardano services that we might need.
✅ For this guide we assume you have already downloaded the cardano-up binary and have opened the Ubuntu app. If you have not done that yet, see our Quick Start guide.
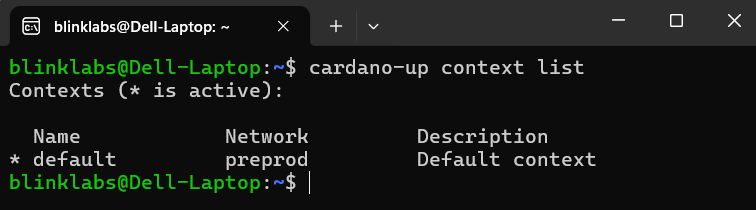
Before we start installing packages, we need to understand what contexts are and how cardano-up use them.
Contexts are used to allow you to install multiple copies of the same package with different network configurations side by side. They allow you to do things
such as running a preprod and mainnet Cardano node on the same machine, or even have multiple preview Cardano node instances running different versions
of the node.
Commands such as install, uninstall, and list work in the active context. You can use the context command to change the active context or manage available contexts.
The context subcommand manages contexts. It has subcommands of its own for the various context-related functions.
For this guide we will install into the default context which is set to the prepod network. If you want to see how to create your own context or change the network see our Reference Guide.
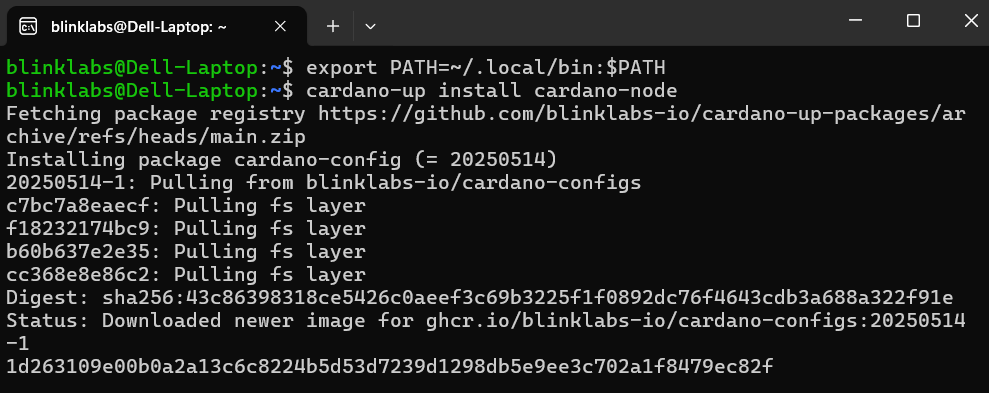
🛑 In order to install a package and interact with it we need to add ~/.local/bin to your $PATH by adding the following to your shell RC/profile to make any commands/scripts installed readily available
export PATH=~/.local/bin:$PATH
✅ For this example we will install our package into the default context which is set to the prepod network
The package we will install is the Cardano Node. To install the Cardano Node using cardano-up we will run the following command:
cardano-up install cardano-node
Once the install is complete, we will see the following successfully installed message. We can note that it installed the following packages that are needed for Cardano Node: cardano-config, cardano-cli, mithril-client, and the cardano-node.
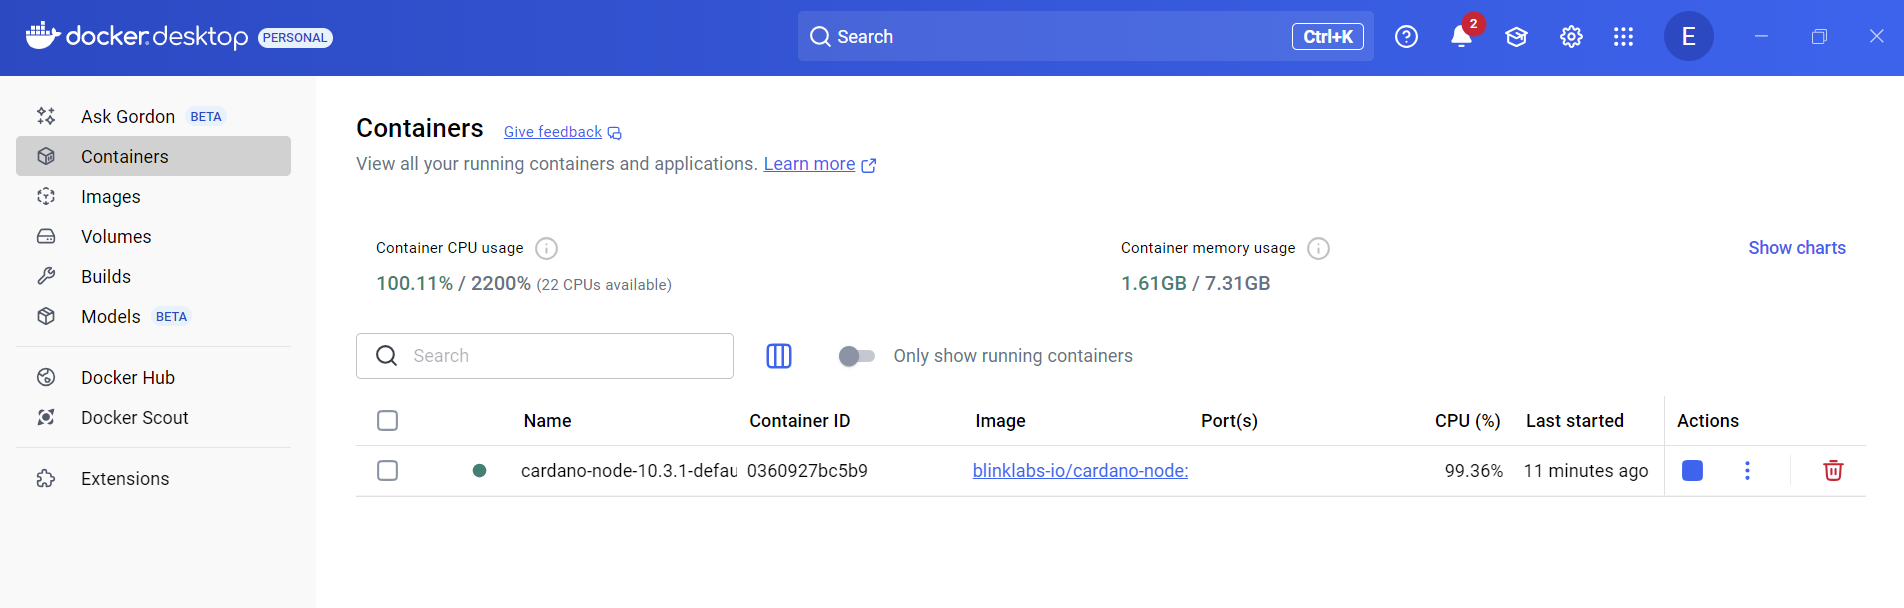
💡 Tip: We can also now see the Cardano Node in Docker Desktop under our containers.
Congratulations you have install your first Cardano package with cardano-up and have the docker image ready to use!
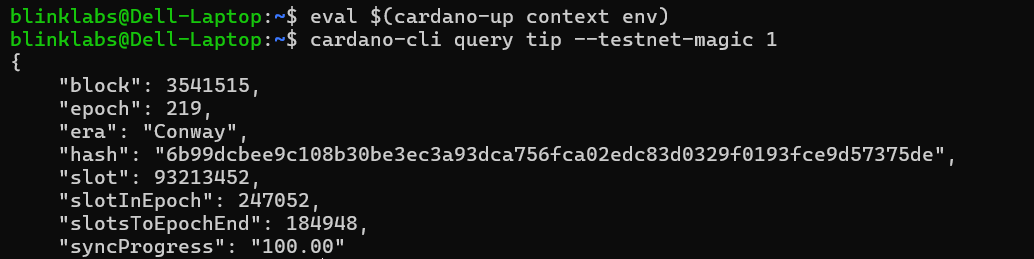
Let’s view the packages in our context, output our environment variables and test our Cardano node by finding the current blockchain tip using the cardano-cli. We will also see available packages for us to install in case we want to install another package to use with the Cardano Node.
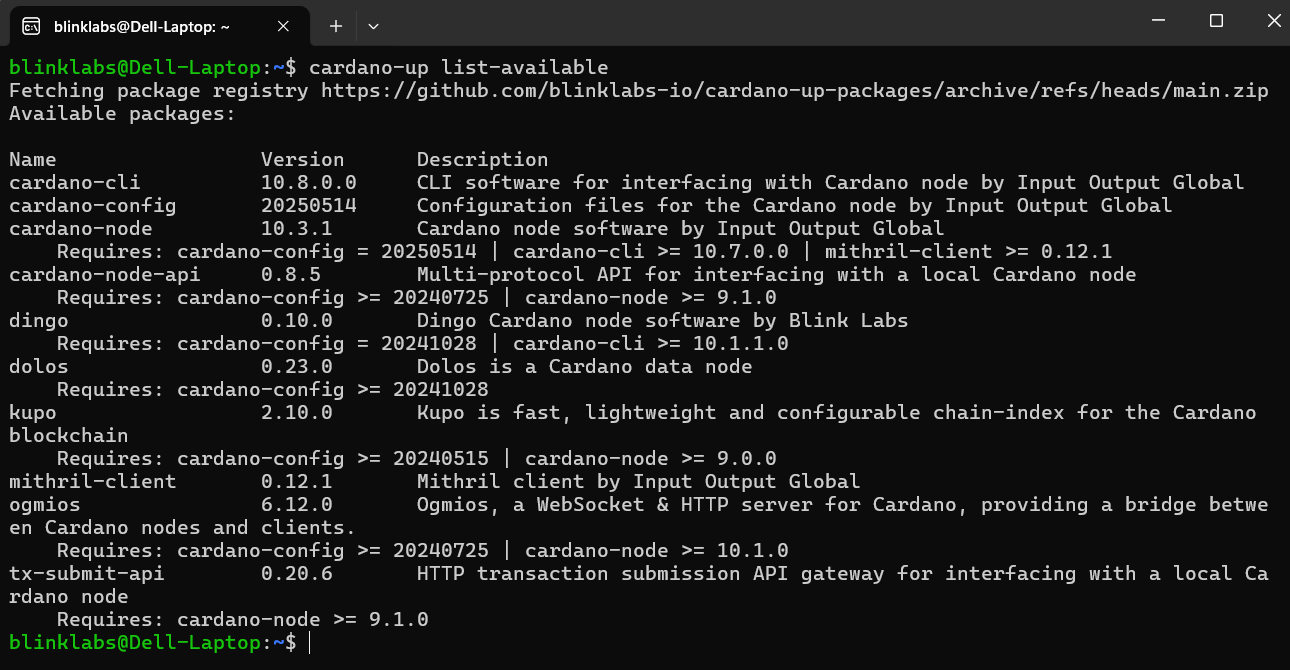
Let’s now see what other packages are available that we might need or want to install. We can run the following command to see available packages:
cardano-up list-available
💡 Tip: You can see the required packages that will be installed if you install a certain package. For example, you can see if you install the Cardano node it Requires: cardano-config, cardano-cli and mithril-client
Want to see what else you can do or how to fine tune your setup, see our Reference Guide